Maintaining your car’s engine oil is one of the most important aspects of vehicle care. Regularly checking and replacing engine oil ensures your engine runs smoothly, prevents breakdowns, and extends your vehicle’s life. The excellent news is you don’t need to visit a mechanic every time you want to maintain your car’s oil. With some basic tools and knowledge, you can handle this task at home. In this guide, we’ll show you step-by-step how to check and replace engine oil safely and effectively.
Why Engine Oil Maintenance Is Crucial
Engine oil is the lifeblood of your car’s engine. It lubricates moving parts, reduces friction, absorbs heat, and removes contaminants. Without proper oil maintenance, your engine can overheat, wear out prematurely, or even seize.
Key benefits of regular oil checks:
- Smooth engine operation: Oil reduces friction between moving parts, keeping your engine running efficiently.
- Improved fuel efficiency: Clean oil helps your engine work less, saving fuel.
- Longer engine life: Fresh oil prevents wear and tear, extending your engine’s lifespan.
- Prevent expensive repairs: Ignoring oil maintenance can lead to costly breakdowns.
By learning how to check and replace your engine oil, you save money, maintain vehicle performance, and avoid inconvenient trips to a mechanic.
Tools and Materials You’ll Need
Before you start, gather these essential tools and materials. Having everything ready makes the process safer and faster.
Basic tools:
- Wrench or socket set: For loosening the oil drain plug.
- Oil filter wrench: Helps remove a tight oil filter.
- Drain pan: To catch old oil.
- Funnel: For pouring new oil without spills.
- Gloves: Protect your hands from dirty oil.
- Use rags or paper towels for cleaning spills and wiping dipsticks.
Materials:
- New engine oil: Consult your vehicle manual for recommended type and quantity.
- New oil filter: Replace the old one for optimal engine protection.
- Oil filter gasket (optional): Some filters include a new gasket.
Having these ready ensures you can complete the oil change efficiently and safely.
Step 1: Prepare Your Car for an Oil Check
Before touching the oil, make sure your car is ready. Proper preparation ensures safety and accurate results.
- Park on a level surface: This ensures you get a correct oil level reading.
- Turn off the engine: Wait for a few minutes if the engine was running, allowing oil to settle.
- Engage the parking brake: Prevents accidental movement.
- Gather your tools and materials: Keep everything within reach.
Safety tip: Never check or change engine oil on a slope or when the car is hot enough to burn you.
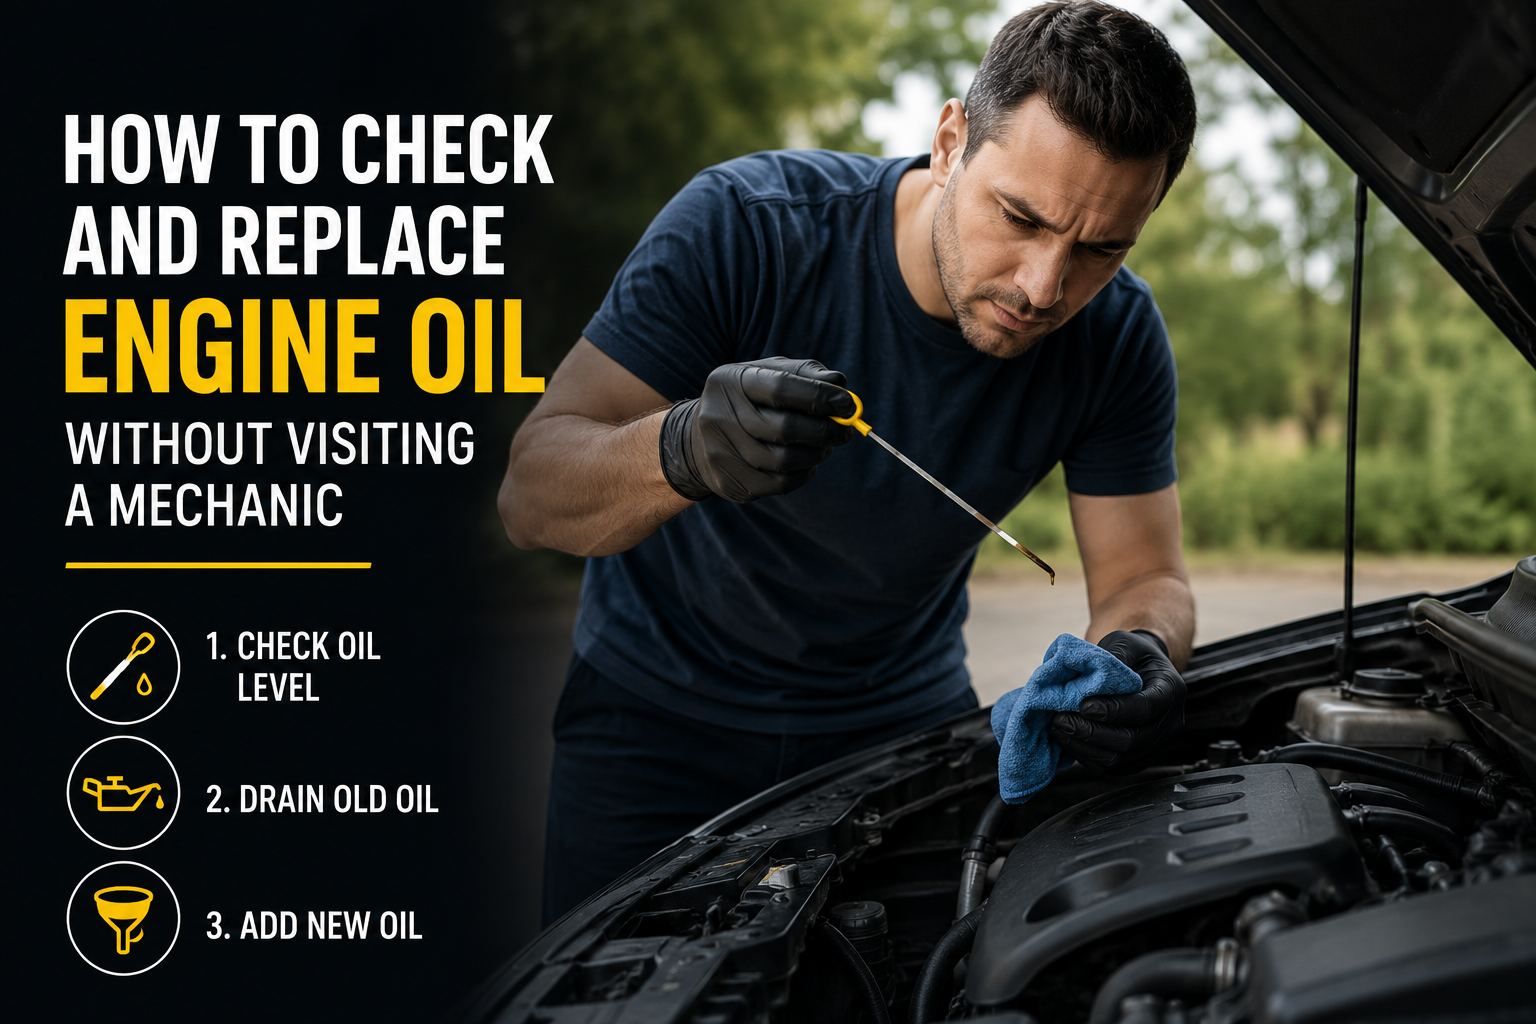
Step 2: How to Check Engine Oil Level
Checking your engine oil is simple and can be done in a few minutes. Here’s how:
- Locate the dipstick: Open the hood and find the oil dipstick, usually marked with a bright handle.
- Pull out and wipe the dipstick: Remove it, wipe off old oil with a clean rag, and reinsert fully.
- Check the oil level: Pull out the dipstick again and observe the markings. The oil should be between the minimum and maximum indicators.
- Assess oil quality: Fresh oil is amber and slightly transparent. Dark, gritty, or thick oil indicates it’s time for a change.
Checking oil regularly, at least once a month, helps prevent engine issues and ensures your car runs smoothly.
Step 3: Draining Old Engine Oil
Replacing oil starts with safely removing the old oil. Follow these steps:
- Lift your car safely: Use a jack and secure it with jack stands. Never rely on the jack alone.
- Locate the oil drain plug: Usually at the bottom of the engine oil pan.
- Position the drain pan: Place it directly under the drain plug to catch the old oil.
- Remove the drain plug: Carefully unscrew it with a wrench. Allow oil to fully drain.
- Inspect the drain plug: Look for metal shavings or debris, which could indicate engine wear.
Tip: Warm oil drains faster, but avoid handling extremely hot oil to prevent burns.
Step 4: Replacing the Oil Filter
The oil filter removes contaminants from your engine oil. Replacing it ensures clean oil circulation.
- Locate the oil filter: Check your vehicle manual if needed.
- Use an oil filter wrench: Loosen and remove the old filter. Be careful; it may still contain oil.
- Prepare the new filter: Apply a thin layer of new oil to the gasket to ensure a proper seal.
- Install the new filter: Screw it on by hand until snug. Avoid overtightening.
Replacing the oil filter with every oil change ensures optimal engine performance and longevity.
Step 5: Adding New Engine Oil
Now it’s time to fill your engine with fresh oil. Follow these steps carefully:
- Locate the oil fill cap: Usually marked with an oil can symbol.
- Use a funnel: Pour the recommended type and amount of new oil slowly to avoid spills.
- Check the level: After filling, wait a few minutes, then recheck using the dipstick. Add oil gradually to reach the correct level.
- Secure the oil cap: Make sure the cap is tightly closed to prevent leaks.
Pro tip: Avoid overfilling, as excess oil can damage engine seals and lead to smoke or leaks.
Step 6: Run the Engine and Check for Leaks
After adding oil, it’s important to ensure everything is working properly:
- Start the engine: Let it run for a few minutes to circulate the new oil.
- Check under the car: Look for leaks around the drain plug and oil filter.
- Recheck oil level: Turn off the engine, wait a few minutes, then verify the oil level. Add if necessary.
Ensuring no leaks and correct oil level prevents engine damage and avoids messy cleanups.
Step 7: Dispose of Old Engine Oil Responsibly
Used engine oil is hazardous and should never be dumped in drains or soil. Follow these tips:
- Use a sealed container: Pour old oil into a suitable container.
- Take it to a recycling center: Many auto shops and recycling centers accept used oil.
- Avoid mixing with other liquids: Keep oil pure to make recycling easier.
Proper disposal protects the environment and may even save you from fines in some areas.
Tips for Maintaining Engine Oil Between Changes
Regular maintenance extends the life of your engine. Here are some practical tips:
- Check oil monthly: Even if you don’t drive much, oil degrades over time.
- Use high-quality oil: Recommended by your vehicle manufacturer.
- Monitor engine performance: Unusual noises or smoke may indicate oil problems.
- Change oil on schedule: Follow manufacturer guidelines, usually every 5,000–10,000 km.
- Keep the engine clean: Dirt and debris can contaminate oil, affecting performance.
These simple habits prevent engine problems and save you money in the long run.
Common Mistakes to Avoid
Even experienced car owners can make mistakes. Avoid these common errors:
- Overfilling oil: Can damage seals and create smoke.
- Using the wrong oil type: Check your manual for the correct viscosity.
- Skipping the oil filter change: Reduces oil efficiency and engine protection.
- Ignoring leaks: Small leaks can lead to serious engine issues.
- Not tightening the drain plug or filter properly: Can result in dangerous spills or engine damage.
Being careful and following steps correctly ensures a smooth, safe oil change.
Conclusion
Changing your engine oil at home may seem intimidating at first, but with the right tools, preparation, and steps, it’s a simple and rewarding task. Regular oil maintenance keeps your engine running efficiently, extends its life, and saves you money on repairs. By learning to check oil levels, replace filters, and pour new oil correctly, you gain confidence in taking control of your car’s maintenance. With practice, the process becomes a quick, routine part of vehicle care—no mechanic required.
FAQs
1. How often should I change my engine oil?
Most vehicles require an oil change every 5,000–10,000 km or every 6–12 months, depending on the type of oil and driving conditions. Always refer to your vehicle’s manual for precise intervals.
2. Can I check engine oil when the engine is hot?
It’s best to wait 5–10 minutes after turning off the engine. Hot oil can provide inaccurate readings and may cause burns.
3. What happens if I overfill engine oil?
Overfilling can damage engine seals, cause excess pressure, and lead to smoke or leaks. Always fill gradually and examine the dipstick.
4. Do I need to replace the oil filter every time I change oil?
Yes, replacing the oil filter ensures that the new oil remains clean and protects the engine effectively.
5. How should I dispose of old engine oil?
Never pour it down drains or soil. Use a sealed container and take it to an authorized recycling center or auto shop for safe disposal.

Written by Michael Reyes, part of the FallasDeAutos editorial team. Michael focuses on helping car owners understand and fix common vehicle problems with simple, practical guidance. His content covers diagnostics, maintenance, and troubleshooting, making complex automotive issues easier to understand. He aims to provide clear, reliable information that helps readers make informed decisions while encouraging consultation with qualified mechanics when needed.