
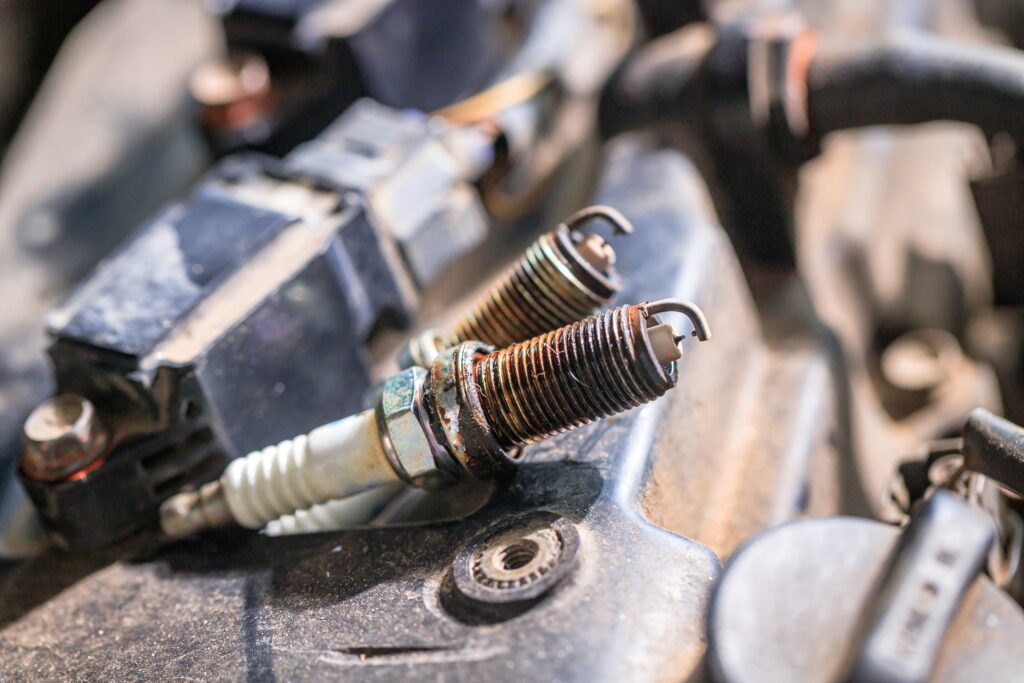
The Day My Engine Started Coughing at Red Lights
It started with a barely noticeable stumble. I was sitting at a stoplight, waiting for green, and the engine seemed to hiccup. Just once. Then smooth again. I chalked it up to bad gas or a cold morning. The next day, it happened twice. By the third day, the check engine light flickered on during my morning commute, and I knew the bad gas theory was dead.
The code was P0302. Cylinder two is misfiring. I had dealt with misfires before, but always on older cars with worn spark plugs or leaking valve cover gaskets. This car was only six years old with sixty thousand miles. The plugs were fine. The coils were original. One of them was failing, and I needed to figure out which one and why before the misfire damaged my catalytic converter or left me stranded.
What followed was a methodical hunt that taught me more about ignition coils than any YouTube video. I learned how they fail, how to test them without guesswork, how to replace them without breaking anything, and how to avoid the same problem again. This guide is exactly what I did, what I learned, and what I wish I had known before the first hiccup at that stoplight.
What an Ignition Coil Actually Does
Modern engines use coil-on-plug ignition. Each cylinder has its own coil sitting directly on top of the spark plug. The coil is essentially a transformer. It takes the twelve volts from your battery and converts it into twenty thousand to fifty thousand volts. That massive voltage jumps the gap in the spark plug, igniting the fuel-air mixture and creating the explosion that pushes the piston down.
When a coil fails, that cylinder stops firing properly. The fuel still gets injected, and the piston still moves, but nothing burns. The unburned fuel washes down the cylinder walls, dilutes the oil, and can damage the catalytic converter if it reaches the exhaust. The engine computer detects the misfire through the crankshaft position sensor, which notices the slight speed variation when a cylinder fails to contribute power. It sets a code, turns on the light, and sometimes disables the fuel injector for that cylinder to protect the converter.
Coils fail in two main ways. Primary winding failure means the low-voltage side of the coil is broken, and the coil produces no spark at all. Secondary winding failure means the high-voltage side is compromised, and the coil produces weak or intermittent spark. Both cause misfires, but secondary failures are harder to diagnose because the coil works sometimes and fails other times. Heat makes it worse. Cold makes it better. This temperature sensitivity is a classic sign of a dying coil.
The Temperature Clue: My misfire only happened when the engine was fully warm. Cold starts were smooth. After twenty minutes of driving, the stumble returned. This pattern pointed directly to a coil with secondary winding damage. Heat expands the internal components, increasing resistance and weakening the spark. Cold contracts them, temporarily restoring function. If your misfire is heat-sensitive, suspect the ignition system before anything else.
Reading the Symptoms Without a Code Reader
Not everyone has a code reader when the problem starts. Fortunately, ignition coil failures announce themselves through driving behavior long before the check engine light appears. Learning these symptoms saves you from the shock of a sudden breakdown.
The most common early sign is a rough idle. The engine shakes slightly at stoplights or in park. You feel vibrations through the steering wheel or seat that were not there before. This happens because one cylinder is not contributing its share of power, creating an uneven firing rhythm. The severity depends on which cylinder is affected. A four-cylinder engine with one dead cylinder loses twenty-five percent of its power. A six-cylinder loses seventeen percent. The smaller the engine, the more obvious the misfire.
Acceleration hesitation is another tell. When you press the gas pedal, the engine stumbles or hesitates before responding. The dead cylinder cannot keep up with the increased demand, and the computer struggles to compensate. This is especially noticeable during highway merging or hill climbing, where the engine is under load.
Fuel smell from the exhaust is a dangerous sign. It means unburned fuel is passing through the engine and reaching the catalytic converter. The converter is designed to burn small amounts of excess fuel, but constant raw fuel overwhelms it. The converter overheats, melts internally, and becomes a thousand-dollar repair. If you smell gasoline from the tailpipe, stop driving and fix the misfire immediately.
| Symptom | What It Means | Urgency Level | When to Act |
|---|---|---|---|
| Slight rough idle | Early coil degradation, occasional misfire | Low | Monitor and test within a week |
| Acceleration hesitation | Coil failing under load, misfire worsening | Medium | Test and replace within days |
| Check engine light flashing | Active misfire damaging catalytic converter | High | Stop driving immediately and diagnose now |
| Fuel smell from exhaust | Unburned fuel reaching the converter: imminent damage | Critical | Do not drive another mile |
| Engine stalls at idle | Severe misfire, computer cannot compensate | Critical | Tow or repair before next drive |
Testing the Coils Without Special Tools
Once you suspect a coil, you need to confirm which one. The code reader tells you the cylinder, but codes can be wrong. Sensors misread. Wiring issues mimic coil failures. A proper test eliminates doubt and prevents wasted money on unnecessary parts.
The simplest test is the swap method. Move the suspected coil to a different cylinder and move that cylinder’s coil to the suspected position. Clear the codes and drive until the misfire returns or the code resets. If the misfire code moves to the new cylinder, the coil is bad. If the code stays on the original cylinder, the problem is something else. Spark plug, injector, wiring, or compression issue. This test costs nothing and takes fifteen minutes.
I used this method with my P0302. I swapped the coil from cylinder two with the coil from cylinder four. Within a day, the code changed to P0304. That was definitive proof. The coil was the problem, not the plug, not the wiring, not the injector. I ordered a replacement that afternoon.
For a more technical test, you can measure coil resistance with a multimeter. Disconnect the coil connector and measure across the primary winding terminals. Typical values range from half an ohm to two ohms depending on the manufacturer. Then measure the secondary winding by connecting one lead to the high-voltage output where the spark plug connects and the other lead to a primary terminal. Typical values range from five thousand to twenty thousand ohms. Compare your readings to factory specifications. A coil with infinite resistance on either winding has completely failed. A coil with out-of-spec resistance is degraded and will fail soon.
My Testing Mistake: I initially tried to test the coil resistance while it was still hot from driving. The readings were erratic and meaningless. Coils must be at room temperature for accurate resistance testing. Heat changes resistance. I let the engine cool for two hours, retested, and got a clear secondary winding reading of forty-seven thousand ohms. The specification was twenty-five thousand. The coil was nearly double the allowed resistance, explaining the weak spark under load. Temperature matters for both symptoms and testing.
Why Coils Fail and How to Prevent It
Ignition coils are surprisingly durable, but they live in a hostile environment. Engine heat, vibration, and electrical stress all take their toll. Understanding the common failure modes helps you avoid premature replacements and spot problems before they strand you.
Heat is the biggest killer. Coils sit on top of the engine where temperatures regularly exceed two hundred degrees Fahrenheit. The internal windings are coated with insulation that degrades over time. Once the insulation breaks down, the windings short against each other or the metal case. The coil loses efficiency and eventually fails completely. Engines that run hot due to cooling system problems or aggressive driving accelerate this degradation.
Spark plug condition also affects coil life. A worn plug with an enlarged gap requires higher voltage to fire. The coil must work harder, generating more heat and stress. A plug that should fire at twenty thousand volts might demand thirty thousand if the gap is too wide. The coil strains to deliver, overheats, and fails prematurely. Replacing plugs on schedule protects your coils. This is why manufacturers recommend replacing coils and plugs together in some applications.
Moisture intrusion destroys coils from the outside. The rubber boot that seals the coil to the spark plug can crack or shrink with age. Water from rain, car washes, or flooded roads enters the boot, creates a conductive path, and causes misfires or coil shorting. The coil itself might be fine, but the moisture makes it appear failed. Drying the boot and applying dielectric grease can restore function without replacing anything.
Aftermarket coils are a gamble. The original equipment coils from your manufacturer are designed for your specific engine. Cheap aftermarket alternatives often use thinner wire, poorer insulation, and less precise manufacturing. They cost less upfront but fail faster and can damage other components. I learned this the hard way on a previous car. A bargain coil lasted eight months before failing again. The OEM replacement I bought afterward is still working three years later.
Replacing the Coil Without Breaking Things
Coil replacement is straightforward on most engines, but there are traps that turn a simple job into an expensive mistake. The first rule is to disconnect the battery. Not because the coil carries high voltage, but because accidentally grounding a tool against the engine can damage sensors or the computer. The negative terminal comes off in thirty seconds. Do it.
Remove the engine cover if your car has one. These usually pop off with gentle upward pressure or a few screws. Then locate the coil pack. On a four-cylinder engine, you will see four coils in a row along the top of the engine. On a V6 or V8, they are arranged along the cylinder heads, sometimes buried under intake manifolds or decorative covers. A service manual or online guide for your specific engine is worth consulting before you start wrenching.
Disconnect the electrical connector from the coil. These connectors usually have a locking tab that must be pressed or slid before the connector releases. Do not force it. Broken connectors mean splicing wires or replacing the entire harness section. Patience saves money here. Once the connector is free, remove the bolt that holds the coil to the valve cover or cylinder head. These bolts are small, usually ten millimeters, and thread into aluminum. Aluminum strips easily if you overtorque them. A quarter-inch drive ratchet is the right tool, not a half-inch impact gun.
Pull the coil straight up and out. It may resist slightly because the rubber boot seals tightly to the spark plug. Twist gently while pulling if needed. Do not yank sideways. The spark plug porcelain is fragile, and a broken plug means extracting ceramic fragments from the cylinder head. That is a job for a shop, not a driveway.
Inspect the boot before installing the new coil. Look for cracks, tears, or carbon tracking, which appears as black lines inside the boot where high voltage has arced. If the boot is damaged, replace it or the entire coil if the boot is not separate. Apply a thin layer of dielectric grease to the inside of the new coil boot. This prevents moisture intrusion and makes future removal easier. Do not use regular grease or petroleum products. They conduct electricity and will cause misfires.
Install the new coil by pressing it firmly onto the plug until you feel the boot seat. Reinstall the bolt and tighten to specification, usually around seven to ten foot-pounds. Reconnect the electrical connector until the lock clicks. Repeat for any other coils you are replacing. Reconnect the battery, start the engine, and verify smooth operation. Clear any stored codes with your reader or by disconnecting the battery for a few minutes.
The Torque Trap: I almost stripped the coil bolt hole on my first replacement. The bolt felt tight, so I kept turning. Then it got loose. I had stripped the aluminum threads. The fix was a thread repair insert, which cost me forty dollars and three hours. The correct torque was eight foot-pounds, barely more than hand-tight. A torque wrench is not optional for small aluminum fasteners. It is insurance against stupidity.
When to Replace One Coil or All of Them
This is the most common question I see online. One coil failed. Should I replace just that one or all of them? The answer depends on age, mileage, and your tolerance for risk.
If your car has over eighty thousand miles and the coils are original, replace all of them. Coils age similarly. The one that failed first was the weakest, but the others are not far behind. Replacing one at a time means repeated diagnostic work, repeated labor, and repeated risk of being stranded. The incremental cost of buying a set is usually less than the cost of doing the job three more times.
If your car has low mileage and one coil failed prematurely, replace just the failed one. Premature failure is often an isolated defect, not a pattern. Monitor the others and replace them if symptoms develop. This approach saves money without excessive risk.
I replaced all four coils on my four-cylinder engine because the car had seventy thousand miles and the original coils were six years old. The peace of mind was worth the extra cost. On a V6 or V8, replacing all coils gets expensive, and the math changes. In those cases, I replace the failed coil and keep a spare in the trunk. If another fails, I am prepared without paying for six coils upfront.
After the Replacement: What to Watch
A new coil does not guarantee instant perfection. There are follow-up checks that confirm the repair and catch any collateral damage from the misfire.
Monitor fuel economy for a few tanks. A misfiring cylinder wastes fuel, and your average should improve after the repair. If the economy stays poor, the catalytic converter may have been damaged, or another problem exists. Check the oil level and condition. Unburned fuel from the misfire dilutes oil and accelerates engine wear. If the oil smells like gasoline, change it regardless of mileage. The fuel contamination reduces lubrication and can damage bearings.
Listen for returning symptoms. A new coil that fails quickly suggests an underlying issue. Bad plugs, excessive heat, or electrical problems will kill the replacement just like the original. If the misfire returns within days, dig deeper before replacing another coil.
Clear the codes and drive until the monitors are complete. The computer runs self-tests on emissions systems, and some require specific driving conditions. Highway cruising, stop-and-go traffic, and cold starts all trigger different tests. A full drive cycle usually takes a few days of normal driving. If the check engine light stays off and no codes return, the repair is solid.
What I Learned About Ignition Systems
Before this experience, I treated ignition coils as mysterious black boxes. They worked or they did not, and I had no insight into why. Now I understand them as wear items with predictable failure patterns. Heat kills them. Bad plugs stress them. Moisture invades them. Cheap replacements disappoint.
The diagnostic process taught me patience. I wanted to throw parts at the problem. The swap test forced me to be methodical. The resistance test forced me to wait for the engine to cool. The torque wrench forced me to respect small fasteners. Each constraint made me a better mechanic than I was before the misfire started.
Most importantly, I learned that symptoms are data. The rough idle, the heat sensitivity, and the fuel smell—each one told me something specific about the failure mode. Ignoring symptoms or rationalizing them delays diagnosis and increases damage. The engine was talking to me from the first hiccup. I just needed to listen properly.
Sources and References
- Haynes Manuals. (2024). Automotive Ignition Systems: Coils, Plugs, and Diagnostic Procedures. Haynes Publishing.
- Automotive Service Excellence (ASE). (2023). Engine Performance: Ignition System Diagnosis and Repair. Retrieved from https://www.ase.com/
- Car and Driver. (2024). How to Diagnose and Replace Ignition Coils. Retrieved from https://www.caranddriver.com/features/
- Popular Mechanics. (2023). Ignition Coil Failure: Causes, Symptoms, and Prevention. Retrieved from https://www.popularmechanics.com/cars/
- Edmunds. (2024). Understanding Misfire Codes and Ignition System Maintenance. Retrieved from https://www.edmunds.com/how-to/
- Bosch Automotive. (2023). Ignition Coil Technology and Service Guidelines. Bosch Technical Documentation.

Written by Michael Reyes, part of the FallasDeAutos editorial team. Michael focuses on helping car owners understand and fix common vehicle problems with simple, practical guidance. His content covers diagnostics, maintenance, and troubleshooting, making complex automotive issues easier to understand. He aims to provide clear, reliable information that helps readers make informed decisions while encouraging consultation with qualified mechanics when needed.